Knowing how to install a ridge cap on a metal roof is the kind of technical knowledge that separates a finished roof from a roof waiting to fail at its most exposed point. The ridge is where two opposing roof slopes meet at the peak, and it is the highest point on the entire assembly. Every drop of rain, every push of wind, and every freeze-thaw cycle that moves through a Calgary winter tests that junction repeatedly.
Getting the ridge cap right is not a finishing detail in the decorative sense. It is a waterproofing and structural decision that affects the long-term performance of everything below it. This piece walks through what a proper ridge cap installation actually involves on a metal roof, what the failure points look like when it is done incorrectly, and why most Calgary homeowners who start this research intend to do it themselves end up understanding why the professionals who do this work regularly charge what they charge for it.
At Lumina Roofing & Exteriors, ridge cap installation is one of the details we treat as non-negotiable, because it is one of the places where shortcuts show up years before anything else on the roof does.
What a Ridge Cap Does and Why It Matters More on Metal Than on Shingles
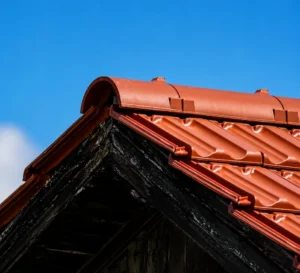
A ridge cap covers the peak of a metal roof where the two upper edges of the panel field meet. Its job is to seal that junction against water infiltration, block wind-driven debris and precipitation from entering the attic space, and provide a finished termination for the panel edges at the highest point of the roof. On an asphalt shingle roof, the ridge cap is a formed shingle product that overlaps itself and the field below it with a relatively forgiving method for installing a ridge cap on a metal roof.
Metal roofing panels expand and contract with temperature changes in ways that asphalt shingles do not. Calgary’s climate, with its Chinook-driven swings of 25 to 30 degrees Celsius within hours and its extended sub-zero stretches through winter, puts those expansion and contraction forces through their full range repeatedly throughout the year.
A ridge cap that is fastened incorrectly, sealed with the wrong product, or installed without accounting for thermal movement will show the effects of those forces at the fastener points and the sealant joints long before any other part of the roof does.
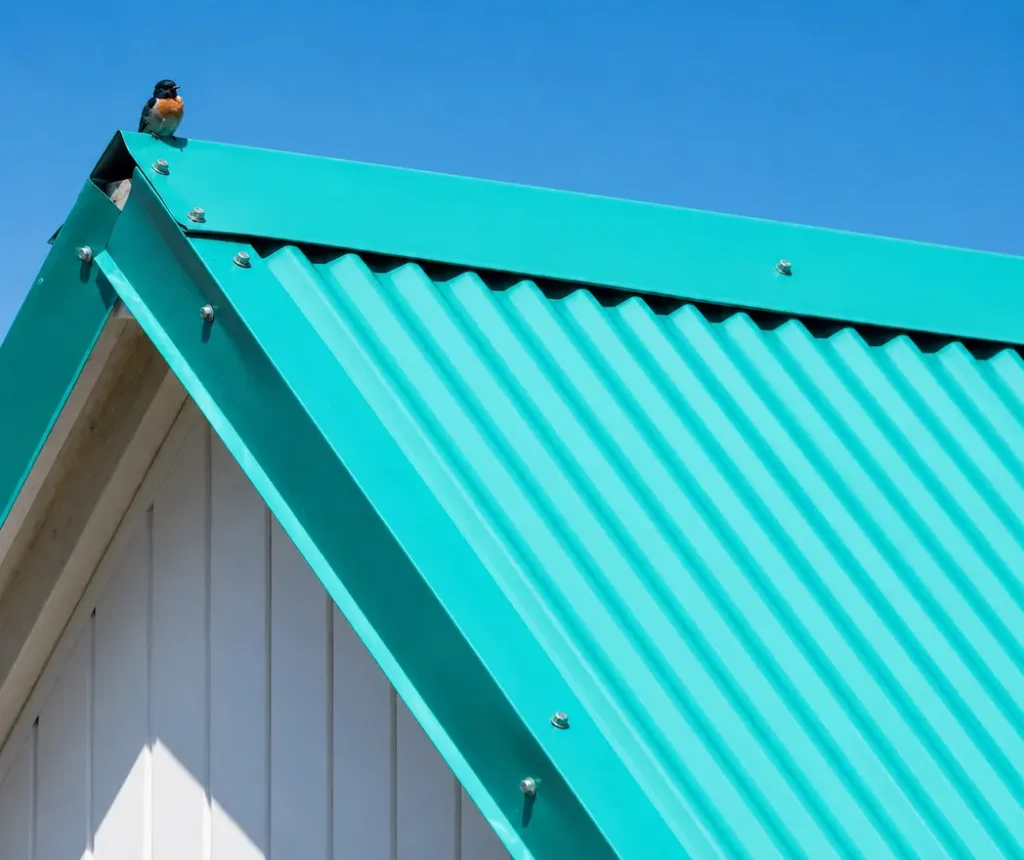
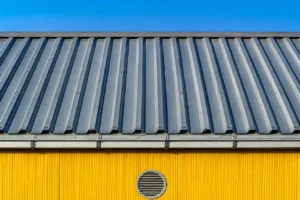
The profile of the ridge cap must match the profile of the panel system below it. A standing seam panel field requires a ridge cap formed to close over the seams at the peak. An exposed fastener panel system uses a different cap profile that lays flat across the panel corrugations and fastens into the structural substrate below.
The Tools and Materials Required Before Starting
Understanding how to install a ridge cap on a metal roof starts with knowing what the job actually requires before anyone gets on the roof. The ridge cap component itself needs to be the correct profile for the panel system being finished, formed from metal that matches or is compatible with the panel material to avoid galvanic corrosion at contact points.
Aluminum cap on steel panels or copper fasteners in contact with aluminum panels are combinations that create electrochemical deterioration over time, and Calgary’s climate accelerates that process compared to drier or milder environments.
Closure strips are a component that homeowners without metal roofing experience frequently overlook. These are foam or rubber inserts, either open-cell for ventilated applications or closed-cell for sealed ones, that conform to the profile of the metal panel and fill the gap between the corrugated panel edge and the underside of the flat ridge cap.
Butyl tape sealant, self-drilling metal roofing screws with neoprene washers rated for outdoor metal applications, a metal brake for field-forming any custom pieces required at the ridge termination, tin snips, a drill with the correct bit for the fastener being used, and appropriate fall protection for working at ridge height are all part of the tool and material list.
The fall protection requirement is not optional. A residential ridge in Calgary puts a worker four to six metres or more above the ground on a sloped surface, and the legal and safety requirements for working at that height apply regardless of whether the person on the roof holds a contractor’s license.
How to Install a Ridge Cap on a Metal Roof: The Process Step by Step
-
The installation sequence
The first sequence in how to install a ridge cap on a metal roof begins at the substrate level. Before any cap component goes on, the panel edges at the ridge need to be confirmed to be at the correct height and properly terminated. On an exposed fastener system, the top edges of the panels should be fastened at the structural purlin or ridge board below, with the upper fastener row sitting at a consistent height across the full ridge length.
-
Closure strips go on next
Adhered to the top surface of the panels along both sides of the ridge peak. On most metal panel systems, the manufacturer specifies whether the closure strip at the ridge should be open-cell or closed-cell depending on whether the installation includes a ridge vent for attic ventilation. An open-cell strip at a non-vented ridge allows air movement where the assembly is designed to be sealed, which introduces moisture risk.
-
How to install a ridge cap on a metal roof: Butyl tape sealant
It goes over the closure strips along the cap contact line before the cap is set. This sealant layer provides the primary waterproof seal at the junction between the cap underside and the panel surface. The tape needs to be applied continuously without gaps, particularly at the corners where the closure strip sections meet.
-
Gaps in the butyl tape
They are the most common source of early water infiltration in how to install a ridge cap on a metal roof, and they are completely invisible once the cap is in place. Finding them later requires removing the cap, which on a properly fastened metal cap means drilling out fasteners and potentially deforming the cap profile enough that the piece cannot be reinstalled. The cap itself is set over the closure strips and butyl tape and aligned to run consistently along the ridge line before any fasteners go in.
On a long ridge run, starting at one end and working toward the other ensures that the overlap between cap sections is consistent and directionally correct relative to the prevailing wind. Overlaps that face into the prevailing wind direction create a leading edge that wind-driven rain can get behind. In Calgary, where wind direction varies seasonally, understanding the dominant storm approach direction for a specific roof orientation matters for that decision.
-
Fasteners go through the cap
Through the closure strip, and into the structural substrate below. The neoprene washer on each fastener compresses against the cap surface to seal the fastener penetration. Overtightening deforms the washer and the cap surface around it, which compromises the seal. Undertightening leaves the fastener loose enough to back out under thermal cycling, which lifts the cap edge and breaks the butyl seal below.
Finding the correct torque on a self-drilling metal roofing screw into a standing seam panel or a structural purlin is a tactile skill developed through repetition, not a setting on a drill that can be preset and applied consistently by someone doing it for the first time, and then you won’t have any problem in how to install a ridge cap on a metal roof.
Where Ridge Cap Installations Fail and What That Looks Like
The failure modes on a poorly installed ridge cap develop quietly. The first sign in how to install a ridge cap on a metal roof is often a small water stain on the ceiling or the attic framing directly below the ridge, appearing in late winter or early spring when the accumulated effect of the heating season’s moisture intrusion becomes visible. By the time that stain appears, the intrusion has been happening for at least one season and potentially longer.
Fastener backout is the most common mechanical failure on ridge caps in climates with significant thermal cycling. When a fastener backs out even slightly, it lifts the cap edge above it, breaks the contact between the cap underside and the butyl tape below, and creates an entry point for water and wind-driven debris.
The lifted area may not be visible from the ground, particularly on a steep pitch where the ridge is not in direct sightline. A drone inspection or a physical roof walk is the only reliable way to identify fastener backout before it has produced interior damage. Sealant failure at the end caps is another consistent failure point. End caps are the formed pieces that close the open ends of the ridge cap at the gable ends of the roof.
A poorly formed end cap that leaves gaps at the contact line allows water to track laterally under the cap during heavy rain or wind-driven precipitation events. In Calgary, those events happen during the spring and summer hail season when rain volume and wind speed combine in ways that test every detail of a metal roof installation.
Why This Work Is Different When You Are Not Doing It Every Day
The sequence described above is accurate for how to install a ridge cap on a metal roof correctly. Reading it and executing it are separated by a gap that is larger than it appears on paper, and the consequences of errors at the ridge are more significant than errors at other points on the roof because the ridge is the highest vulnerability point in the assembly.
Professional metal roofing crews develop a feel for the specific tolerances of the system they are working with. The correct compression on a neoprene washer, the right positioning of a closure strip at a profile that does not quite match the generic foam available at a hardware store, the way a standing seam ridge cap needs to be walked into position along the panel seams without deforming either component in the process. These are skills built through installing the same system repeatedly on conditions that vary enough to demand judgment, not just procedure following.
The cost of a professional ridge cap installation on a metal roof in Calgary is a fraction of the cost of removing and reinstalling a cap that was done incorrectly, finding and repairing the moisture damage that developed in the interim, and potentially addressing deck damage if water penetration ran far enough into the assembly.
At Lumina Roofing & Exteriors, how to install a ridge cap on a metal roof is part of every metal roofing project we complete, and it is inspected as part of the system rather than treated as a final step that follows itself after the panel field is done. If you are looking at a metal roofing project and want to understand what proper ridge detailing looks like and what it costs on your specific roof, explore our metal roofing services to see how we approach the full installation scope.
What to Look For If a Ridge Cap Is Already Installed on Your Home
Homeowners who are buying a property with an existing metal roof, or who asked how to install a ridge cap on a metal roof, they are not certain about, can look for a few indicators of ridge cap quality without getting on the roof themselves. From the ground using binoculars or a zoom lens on a smartphone, a well-installed ridge cap runs straight and consistent along the full ridge length without visible waves or lifted sections. The fastener line should be regular and consistent in spacing.
Visible rust staining below the fastener line suggests that fastener material is not compatible with the panel material, or that the fasteners are backing out and exposing raw metal to moisture. Either condition indicates a detail that needs professional evaluation. A cap that shows sections of lifted edge, even minor lifting visible only at certain viewing angles, is showing early-stage fastener backout that needs to be addressed before the next Calgary hail season or freeze cycle compounds the existing condition.
The attic space directly below the ridge is the most informative inspection point for ridge cap performance. Fresh moisture staining on the underside of the roof deck along the ridge line, insulation that is compressed or discoloured at the peak, or visible daylight at the ridge from inside the attic all indicate that the ridge cap is not performing as a sealed assembly. Those conditions warrant a professional inspection before another season passes.
How to install a ridge cap on a metal roof: Making the Right Call on Your Ridge Cap
Ridge cap installation on a metal roof sits at the intersection of waterproofing, thermal performance, and long-term structural protection. Done correctly, it is the detail that allows the rest of the metal roofing system to perform at the level the manufacturer’s warranty assumes. Done incorrectly, it is the detail that undermines that performance quietly and progressively until the evidence becomes impossible to ignore.
The homeowners who get the best results from metal roofing are the ones who understand enough about the installation to ask the right questions of the contractor doing the work, to review the specification for the system being installed, and to evaluate the finished product against what a proper installation should look like.
That knowledge is valuable whether you are hiring a contractor or evaluating one who has already done the work. If you want an honest assessment of the ridge cap condition on your Calgary home’s metal roof, or if you are planning in how to install a ridge cap on a metal roof and want to understand what the ridge detailing scope involves, contact Lumina Roofing & Exteriors and we will give you a clear picture of what your roof needs before anything else is decided.